Updated: September 14, 2026
This post contains affiliate links. As an Amazon Associate I earn from qualifying purchases, and I earn a commission on qualifying purchases from HTVRONT — at no extra cost to you.
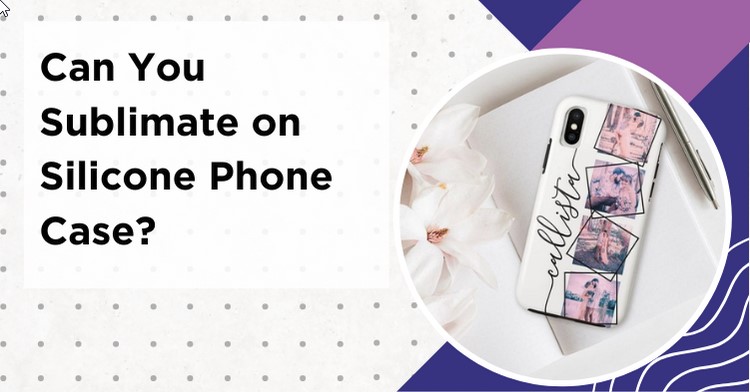
Sublimation on a silicone phone case is one of those topics where the honest answer saves you a ruined blank. You can absolutely make a custom sublimation phone case, but not the way most people first picture it. Standard silicone does not carry a dye-receptive sublimation coating, so the design transfers to a sublimation-ready surface instead, usually a coated aluminum insert or a coated hard case. Understanding that one difference is the whole game.
My Quick Answer
You cannot reliably sublimate directly onto standard bare silicone, TPU or rubber, because these materials do not have a dye-receptive sublimation coating. Sublimation needs a polyester-rich material or a purpose-made coating. Many products sold as a “silicone sublimation phone case” are a silicone or TPU bumper paired with a separate coated insert, commonly aluminum, and the design transfers onto that insert. For a fully wrapped design you need a blank made for a 3D system plus a 3D vacuum press. Match temperature and time to the blank’s instructions, since coatings vary a lot.
Last Updated: July 2026
Can you sublimate on silicone phone case?
Not onto the bare silicone itself. Silicone, TPU and rubber are technically polymers, but that is not what matters here. What matters is that their untreated surfaces do not have the dye-receptive sublimation coating that disperse dye needs, so the ink has nothing suitable to settle into and the result rubs away. Untreated cotton fails for the same practical reason: it is not a polyester-rich or sublimation-coated surface.
So how do so many sellers offer “silicone sublimation phone cases”? Usually through the construction of the blank. Many of these cases are a silicone or TPU bumper with a separate printable insert, commonly a coated aluminum plate. Your design transfers onto that coated insert in the heat press, and the finished insert then sits inside the case back. You get a custom phone case, but the color lives on the insert, not on the silicone.
Always check the blank’s construction before you buy, because sellers do not use the term consistently and some products are built differently. Knowing this up front prevents the most common beginner mistake, which is pressing a design straight onto a soft case and watching it fade or peel.
Which Phone Cases Can You Actually Sublimate?
Not every phone case takes sublimation, and the description on the listing matters more than the material you can feel. Here is what generally works and what does not, and why.
| Phone case type | Sublimates? | Why |
|---|---|---|
| Silicone or TPU bumper with coated insert | Yes, on the insert | The coated plate, commonly aluminum, holds the dye |
| Coated hard case, flat back (2D) | Usually | Factory sublimation coating is dye-receptive; pressed flat |
| Blank made for a 3D system (full wrap) | Yes, with a 3D vacuum press | Curved sides need vacuum to conform the film |
| Clear or frosted case with printable insert | Yes, on the insert | Same insert principle as the silicone bumper |
| Bare silicone, TPU, rubber or plain plastic | No | No dye-receptive sublimation coating |
| Genuine leather, wood or uncoated metal | No | Not a sublimation-ready surface without a suitable coating |
The safest rule is simple. If a case is not sold specifically as a sublimation blank, with either a coating or a printable insert, treat it as unverified and test one before buying a batch. For the wider picture of what does and does not work, see our guide to what materials you can sublimate on.
2D vs 3D Phone Case Blanks
This is the distinction that decides which equipment you need, and it trips up a lot of beginners. A 2D blank has a flat printable area, either a removable coated insert or a flat coated back, and presses on an ordinary flat heat press. It is the easiest and cheapest way to start, and most silicone-bumper cases fall into this group.
A 3D blank is one made for a 3D system: heat resistant, sublimation coated, and designed so the image wraps around the curved edges for an edge-to-edge look. A flat press cannot make even contact on those curves. A 3D vacuum press uses heat and vacuum to conform the printed sublimation film closely around the case’s sides, corners and contours. HTVRONT’s H17 is one machine built for exactly this, with dedicated fixture sets available for iPhone and Android cases. Check what a given kit includes, since a standard package may ship with only one fixture set. You can see how its temperature and time compare to other machines in our HTVRONT heat press settings guide.
My tip: start with 2D insert cases if you are new. They give you clean results on a press you probably already own, and you can move up to a 3D vacuum machine once you know you enjoy making them.
Tools Required For Phone Case Sublimation
For a standard 2D insert or flat coated case, you need a sublimation blank phone case, a heat press, a sublimation printer, sublimation paper, heat resistant tape, butcher paper, and heat resistant gloves. A 3D full-wrap case swaps the flat press for a 3D vacuum machine and uses printable sublimation film rather than ordinary transfer paper.
You can find sublimation blank cases for almost any model, whether you have an iPhone case or a Samsung Galaxy case. For the press, a flat machine handles 2D cases well, and if you want a reliable all-rounder the VEVOR 8-in-1 heat press covers phone inserts alongside shirts and other flat blanks.
On the printer side, any properly configured sublimation printer works as long as it is compatible with the paper or film your blank requires, since a phone insert is small. Larger EcoTank models like the Epson ET-15000 or ET-8550 are only worth it if you also print shirts and larger blanks. For paper, A-SUB or TexPrint-R both work well.
Step-by-Step Guide for Phone Case Sublimation (2D Insert)
1. Print your design onto sublimation paper and make sure Mirror Image is turned on.
2. Take the printable insert from the case, remove its protective film, and place the insert face down on the printed side of the paper.
3. Use heat resistant tape to hold the insert firmly in place so it cannot shift.
4. Press the insert using the blank manufacturer’s instructions. A common starting range for coated aluminum inserts is 360 to 400°F (182 to 204°C) at medium pressure, but coatings and insert thicknesses vary.
5. Time is usually around 50 to 70 seconds in that range, again following what the blank calls for.
6. Open the press and remove the transfer with gloves, keeping it from shifting as you lift it, and follow the blank’s guidance on when to separate paper and insert.
7. Slide the finished insert back into the case. Your custom phone case is ready.
Phone Case Sublimation Temperature and Heat Press Settings
Phone case blanks vary more than most substrates, so the single most reliable setting is the one printed on your blank’s packaging. Treat the numbers below as starting points, not rules, and let the manufacturer’s instructions win whenever they differ.
| Blank type | Temperature | Time | Pressure |
|---|---|---|---|
| Coated aluminum insert (2D) | 360-400°F (182-204°C) | 50-70 sec | Medium |
| Flat coated hard case (2D) | 350-400°F (177-204°C) | 60-120 sec | Medium |
| Blank for a 3D system (full wrap) | Per machine program | Per machine program | Vacuum |
A few notes matter more than the exact number. The flat coated hard case range is wide because these products differ a lot, and some need a specific fixture or support in the press so they do not distort, which makes heat deformation more likely than with a removable metal insert. Medium pressure keeps the whole design in even contact, preventing patchy or blurred areas. Timing is the biggest variable, since too short leaves colors weak and too long can scorch the coating or bleed the edges.
On a 3D vacuum machine, ignore flat-press numbers entirely and run the program the machine was built for. Those systems may use a lower temperature over a longer cycle, but that varies by machine, so the machine program is the instruction that counts. If you suspect your press display is inaccurate, verify it with a suitable surface temperature probe or heat-press test strips, since infrared thermometers can give misleading readings on shiny, reflective platens.
Phone Case Sublimation Troubleshooting
Most failed phone cases come down to a handful of causes, and nearly all of them are fixable once you know what to look for.
If the design comes out faded or washed out, the usual suspects are a press that ran too cool, a cycle that was too short, or a surface that was never sublimation ready. It is also worth checking that you pressed the correct side of the insert and removed its protective film, and that moisture or color management are not contributing. If colors look ghosted or doubled, paper or film movement is the most common cause, so tape it down firmly and lift straight up without dragging, though poor contact, wrinkles in a 3D film, or a fixture that is not seated properly can do the same. If the case warped or the coating went cloudy, the temperature or time was too high for that blank, and unsuitable blanks, missing support fixtures or excessive pressure can make it worse.
If the print rubs off, the surface may be uncoated or incompatible with sublimation, which is the classic result of pressing straight onto bare silicone. A badly incomplete transfer, surface contamination or a damaged coating can also reduce durability. For a deeper look at color and transfer problems across every substrate, our sublimation troubleshooting guide walks through each one in order.
Frequently Asked Questions
Can you sublimate directly onto a silicone phone case?
Not reliably. Standard bare silicone, TPU and rubber do not have a dye-receptive sublimation coating, so the ink will not bond properly and the design rubs away. Most silicone-style sublimation cases use a separate coated insert, commonly aluminum, and the design transfers onto that insert rather than the silicone itself.
What kind of phone case is best for sublimation?
For beginners, a 2D case with a printable coated insert is easiest, because it presses on a normal flat heat press. If you want an edge-to-edge wrapped design, choose a blank made for a 3D system together with a 3D vacuum press built for full-wrap phone cases.
Do you need a special machine to sublimate phone cases?
Not for 2D inserts or flat coated cases, which press on a flat heat press. Full-wrap 3D cases do need a 3D sublimation press that uses heat and vacuum to conform the printed film to the curved sides, such as the HTVRONT H17.
What temperature do you sublimate a phone case at?
Coated aluminum inserts commonly start around 360 to 400°F (182 to 204°C) for roughly 50 to 70 seconds at medium pressure, while flat coated hard cases can run 350 to 400°F for 60 to 120 seconds. Exact numbers vary by blank, so follow the packaging, and follow the machine program for 3D vacuum presses.
Do sublimation phone cases fade over time?
A properly produced case is generally durable, since the dye sits within the coating, but prolonged UV exposure, abrasion, heat, chemicals and coating quality can all affect appearance over time. A print that already looks pale straight after pressing is a different problem, usually an incompatible surface or insufficient transfer conditions.
Why did my phone case design turn out blurry?
Blurry or ghosted prints most often come from the paper or film moving against the blank during or after pressing. Tape the transfer down firmly and lift the press straight up rather than dragging it. Poor contact, wrinkles in a 3D film, or a fixture that is not seated correctly can produce the same effect.
Conclusion
Making a custom sublimation phone case is genuinely easy once you understand the one thing most guides skip: the color lives on a coated insert or a coated hard shell, never on bare silicone, because that surface has no dye-receptive sublimation coating. Choose a blank sold specifically for sublimation, match a 2D insert to a flat press or a 3D blank to a vacuum machine, and follow the settings on the packaging. Get those basics right and you will turn out clean, durable cases for yourself, for gifts, or to sell.


Emily Johnson is a DIY crafter and the founder of SublimationGuides.com. She started out repairing and sewing clothes for her two sons, then discovered sublimation as a way to personalize her makes. Today she researches and shares honest, tested guides on sublimation settings, troubleshooting, and equipment.